Monthly Archives: April 2018

Implementing LAPS (local administrator password solution) in few simple steps…

I would like to help you setting up LAPS in your environment – just follow this simple guide how to do it and say “bye bye” to not-secure fixed local administrators passwords.

First you need to download x64 (and if you need x86) LAPS from Microsoft website:
https://www.microsoft.com/en-us/download/details.aspx?id=46899

Download LAPS.x64.msi on your Active Directory domain controller and install it – add also Management Tools that are not selected by default:
Install LAPS

After installing it open Powershell on your DC, import Powershell module for LAPS, update AD Schema for LAPS (you need to be schema admin!), define OU where computers / servers that will be under LAPS management are, define user or group that will have privilege to read and reset password for client or server:

Import-Module AdmPwd.PS
Update-AdmPwdADSchema
Set-AdmPwdComputerSelfPermission -OrgUnit Clients
Set-AdmPwdResetPasswordPermission -Identity Clients -AllowedPrincipals “demo\domain admins”
Set-AdmPwdReadPasswordPermission -Identity Clients -AllowedPrincipals “demo\domain admins”

update schem

laps delegate control

Create group policy object on clients / servers OU (in my case with name LAPS) in which you will configure settings and deploy client on machines (yes, the MSI package that was installed on DC needs to be installed on workstations and servers too – the simplest way to do it is by using software deployment in group policy.

laps settings

LAPS deployment

Laps Deployment 2

Reboot your clients or use gpupdate /force to apply group policy settings and installation of the package.

If everything was installed and applied correctly you should see the installed package in programs on client workstation or server:

client install

On your AD server you can now check password by using Powershell or by using LAPS GUI:

Get-AdmPwdPassword -ComputerName w10 -Verbose

password - powershell

laps gu

password - ui

LAPS is great, simple and adds some more security in your environment.
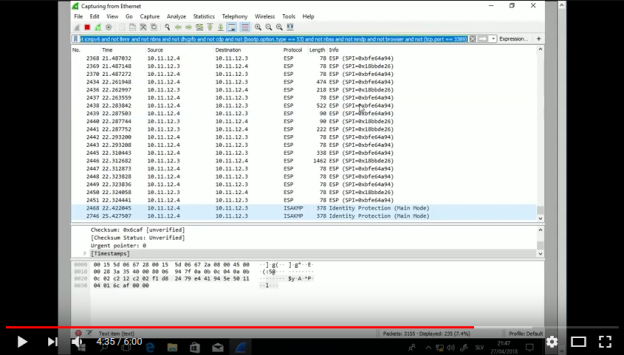


Enable IPSec between Windows 10 client and Windows server 2016 – simple video tutorial

Today I tried to implement IPsec for certain protocols (in my example for TCP port 80 from Windows 10 client to Windows server 2016 running IIS and ICMP just to show it is possible to enable IPSec on per-protocol basis).

In my environment I have setup a simple domain with 2 servers, 1 DC and 1 member server with IIS, 1 Windows 10 domain joined client and one Windows 10 with Wireshark just to sniff the traffic (by using Hyper-V port mirroring).

You can check a 6 minutes video tutorial here.

ipsec

So steps to enable IPSec by using Windows Firewall with Advanced Security (introduced in Windows Vista) are the following:

1. First thing you need to do is to create a security group where you put servers and clients you want to have IPSec policies enabled.

2. Then you need to create a group policy object on top of computers / servers OU (in my case I have created GPO on a domain level – in a production environment I suggest that you put it somewhere lower on top of your computers and servers OUs.
Remove authenticated users from GPO security filtering and insert your IPSec security group

3. Then you need to edit the GPO on the location: Computer configuration / Policies / Windows settings / Security settings / Windows Firewall with Advanced Security / Windows Firewall with Advanced Security / Connection Security Rules
Here you create a new rule:
– I choose Custom rule option
– I left Any IP address selected on both Endpoints (so it will work for all IP addresses)
– I configured the second option on next screen so – Require auth for inbound (so all inbound connections will require authentication – Warning! No access from workgroup or not domain joined computers) and reqeust authentication for outbound (www.google.com does not care about your IPSec policy :))
– On the next screen I used Computer (Kerberos V5) authentication method
– On protocols and ports – in my first example I used TCP 80 on Endpoint1 (so “server side” will require authentication for everyone who would like to access web server on port 80)
– I applied policy on all profiles and I gave a name to my policy.
After creation of the policy you should run: gpupdate /force on both – server and client – I did a reboot just to be sure it will do it – but most of the time gpupdate /force will be enough. You can see your policy on server and client if you open Windows Firewall with Advanced Security and you click on Connection Security Rules

I used another Windows 10 machine with Wireshark software just to monitor the functioning of IPSec – I used Hyper-V port mirroring to send copy of all traffic from my domain joined Windows 10 so you can see from captured traffic that policy was applied correctly and that traffic (opening the http://srv1 and later on pinging srv1) is encrypted.


Add-VMNetworkAdapterExtendedAcl – allow only specific traffic to a VM and allow all outgoing traffic from a VM on Windows server 2016 – Hyper-V

Block all trafic to a VM:
Add-VMNetworkAdapterExtendedAcl –VMName “vm01” –Action “Deny” –Direction “Inbound” –Weight 10
Allow (for example) TCP 80 (HTTP) and TCP 443 (HTTPS) to a VM:
Add-VMNetworkAdapterExtendedAcl –VMName “vm01” –Action “Allow” –Direction “Inbound” –LocalPort 80 –Protocol “TCP” –Weight 11
Add-VMNetworkAdapterExtendedAcl –VMName “vm01” –Action “Allow” –Direction “Inbound” –LocalPort 443 –Protocol “TCP” –Weight 12
 
Allow any TCP and UDP from VM to ANY port and ANY address:
Add-VMNetworkAdapterExtendedAcl -VMName “vm01” -Action Allow -Direction Outbound -RemotePort Any -Protocol tcp -Weight 100 -IdleSessionTimeout 3600 -Stateful $True
Add-VMNetworkAdapterExtendedAcl -VMName “vm01” -Action Allow -Direction Outbound -RemotePort Any -Protocol udp -Weight 101 -IdleSessionTimeout 3600 -Stateful $True
 
Want to start over? Remove all ACLs:
Get-VMNetworkAdapterExtendedAcl -VMName “vm01” | Remove-VMNetworkAdapterExtendedAcl